How to Choose Drip Tape Fittings in 2026?
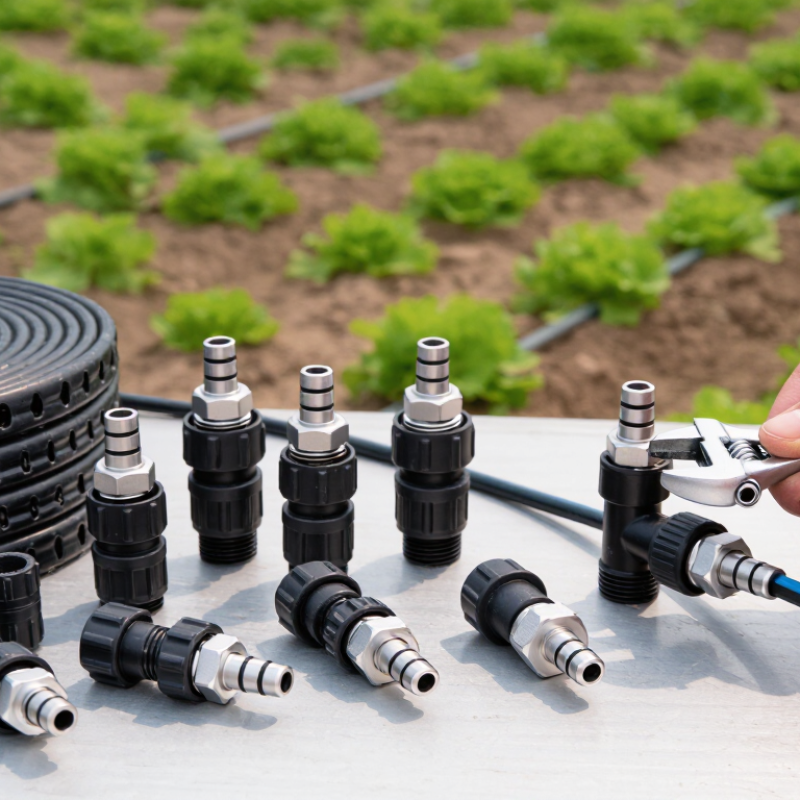
How to Choose Drip Tape Fittings in 2026? The question sounds simple, but field performance often depends on small connections. A fitting may look strong in a product photograph. It can still leak beside a dusty vegetable row. In 2026, growers must compare compatibility, pressure tolerance, installation speed, and long-term reliability before choosing Drip Tape Fittings.
Irrigation specialist Dr. Charles M. Burt has said, “The goal of irrigation is not to apply water, but to apply water efficiently and uniformly.” That principle remains practical. A suitable connector should match the tape diameter, wall thickness, emitter spacing, and operating pressure. It should also tolerate sunlight, fertilizer exposure, and repeated seasonal handling. Barb fittings may work well for quick repairs. Locking or compression designs can provide greater security in larger systems. Not every expensive option is better.
Field experience matters here. Test a small section first. Pressurize it. Watch every joint for several minutes. Then inspect the tape after cooling, expansion, and movement. This simple check can expose weak seals before they waste water across an entire field. It is also wise to keep spare gaskets and connectors nearby. Mistakes happen.
The best choice is not always the newest fitting. Soil texture, water quality, labor skills, and maintenance habits can change the answer. A technically impressive product may fail when workers install it with muddy hands. Therefore, this guide examines practical selection criteria, common fitting types, installation details, and avoidable purchasing errors. Some recommendations may need adjustment. Real fields are rarely perfect.
Define Drip-Tape Size, Wall Thickness, and Flow Before Choosing Fittings
How to Choose Drip Tape Fittings in 2026?
Choosing drip-tape fittings starts with the tape, not the connector shelf. Confirm the tape’s nominal size before ordering anything. Common sizes include 5/8 inch, 7/8 inch, and 1 inch. These measurements can vary between manufacturers. Measure the tape flat, then compare its expanded width with the fitting specification. A loose connection may leak under pressure, while an oversized connector can damage the tape.
Wall thickness matters just as much. Thin tape needs gentle insertion and careful tightening. Thicker tape usually tolerates stronger barbs, but excessive force can still split the plastic. Check the thickness in mils, such as 8, 10, or 15 mil.
Cut the tape cleanly with a sharp blade. A crooked cut often causes poor sealing. I once skipped this step during a field installation. Several fittings dripped, and the repair took longer than expected.
Flow should be defined before selecting valves, manifolds, and end closures. Record emitter flow, emitter spacing, row length, and operating pressure.
For example, 0.5 gallons per hour at 12-inch spacing creates a different demand from 0.4 gallons per hour at 8-inch spacing.
Calculate the total flow for each row, then choose fittings that match the tape opening and pressure range. Test one assembled section first. Watch for wet soil, spray, or a flattened tape near the connection. Small details decide whether the fitting performs reliably.
Match Fittings to 90–95% Drip-Irrigation Application Efficiency Targets
How to Choose Drip Tape Fittings in 2026?
Match Fittings to 90–95% Drip-Irrigation Application Efficiency Targets
Choosing drip tape fittings starts with the tape, not the connector shelf. Confirm tape diameter, wall thickness, emitter spacing, and operating pressure. A fitting must grip firmly without crushing the tape. Small leaks matter. They lower pressure near the inlet and waste water along the row.
For a 90–95% application efficiency target, match fittings with proper filtration and pressure control. Use connectors that maintain a stable seal during temperature changes and routine flushing. Check the inlet manifold for uneven pressure. A pressure difference of only a few kilopascals can create visible variation across long rows. Select valves and end closures that allow simple flushing, because sediment can distort emitter output.
Installation quality often decides the final result. Cut tape ends squarely, remove soil from connection points, and inspect every joint before burying lines. Test several outlets with collection cups, then compare their volumes. This is more reliable than trusting appearance alone. Field conditions can be untidy. Wind, slope, clogged filters, and careless handling may reduce efficiency despite correct fitting selection.
Do not treat 90–95% as a guaranteed number. It is a measured target. Recheck pressure, leaks, and discharge during the season, especially after moving equipment. The best fitting is not always the cheapest or strongest. It is the one that preserves uniform flow and remains serviceable under real operating conditions.
| Application or Fitting Point | Common Drip-Tape Size | Recommended Fitting Type | Key Compatibility Dimension | Typical Operating Pressure | Recommended Filtration | Efficiency Target Contribution | Selection and Installation Check |
|---|---|---|---|---|---|---|---|
| Mainline or submain takeoff | 16–22 mm nominal tape | Barbed takeoff connector with gasket and individual flow control | Outlet diameter should match the distribution tube; tape entry must fit the tape wall and punch size | 0.4–1.0 bar 6–15 psi | 120 mesh is commonly used for clean water; approximately 130 microns | Supports 90–95% | Use a clean, centered punch hole. Check the gasket for full contact and confirm that the takeoff does not rotate under pressure. |
| Tape-to-tape repair or extension | 16 mm, 17 mm, 20 mm, or 22 mm tape | Internal barbed coupler or compression coupler sized to the actual outside diameter | Match the fitting to the tape outside diameter and wall thickness; nominal size alone may not be sufficient | 0.3–0.8 bar 4–12 psi | 120 mesh minimum for most agricultural drip-tape systems | Protects uniformity from leaks and pressure loss | Cut tape squarely, fully seat both ends over the barbs, and pressure-test before covering the joint with soil. |
| Thin-wall seasonal tape | 16–22 mm; approximately 5–8 mil wall thickness | Low-profile compression coupler or soft-barb connector | Thin-wall tape needs a connector that seals without cutting or collapsing the tape | 0.3–0.7 bar 4–10 psi | 120 mesh; improve filtration when using surface water | Helps maintain 90–95% when leakage is controlled | Avoid excessive insertion force. Do not exceed the tape supplier’s pressure rating, especially during flushing and startup. |
| Heavy-wall or reusable tape | 16–22 mm; approximately 10–15 mil wall thickness | Heavy-duty barbed coupler with retaining collar or compression nut | Barb length and sealing diameter must suit the thicker wall without overstressing the tape | 0.4–1.0 bar 6–15 psi | 120 mesh or finer when emitter passages are small | Reduces joint-related losses in long-term systems | Use a fitting with adequate pull-out resistance. Inspect O-rings and collars before each reuse cycle. |
| End-of-row flushing | 16–22 mm nominal tape | Flush valve, removable end cap, or figure-eight end closure | Outlet and closure must match the tape outside diameter and provide a reliable flush opening | 0.4–1.0 bar 6–15 psi | Filtration does not replace regular end flushing | Supports 90–95% by limiting sediment accumulation | Flush until discharge is visibly clear. Install an accessible closure so flushing can be performed without damaging the tape. |
| Pressure-regulated zone connection | Any tape size; commonly 16–22 mm | Pressure regulator combined with a takeoff manifold or zone valve | Regulator flow capacity must exceed the zone design flow; outlet connection must match the supply tube | Usually regulated to 0.6–0.8 bar 9–12 psi | 120 mesh upstream of the regulator | Improves pressure uniformity toward 90–95% | Install a pressure gauge downstream of the filter and regulator. Avoid setting pressure above the tape rating. |
| Fertigation or chemical-injection point | 16–22 mm tape supplied from a filtered manifold | Takeoff connector with non-return protection and isolation valve | Injection equipment must match the zone flow and maintain backflow protection | 0.4–0.8 bar 6–12 psi | 120 mesh; flush the system after injection | Maintains distribution consistency when clogging is prevented | Use compatible seals, prevent chemical backflow, and operate the system long enough after injection to clear the tape. |
| Long row or uneven terrain | Usually 16–22 mm; confirm tape flow and pressure-loss data | Flow-control takeoff with pressure gauge and, where required, separate pressure-regulated zones | Connector size must support the calculated zone flow; row length must follow the tape’s pressure-loss limit | Typically 0.5–0.9 bar 7–13 psi | 120 mesh or finer for difficult water quality | Helps achieve 90–95% only when row length and elevation are correctly designed | Divide oversized zones, verify inlet and tail pressure, and use elevation calculations rather than relying on fitting size alone. |
| Surface-water or reclaimed-water system | Any compatible tape size | Takeoff, coupler, and flush fittings selected with a robust filtration and maintenance arrangement | All wetted components should tolerate the water chemistry and operating temperature | Follow the tape rating; commonly 0.4–0.8 bar 6–12 psi | 120 mesh minimum; water testing may justify finer filtration or pre-treatment | Protects the 90–95% target from clogging-related decline | Check suspended solids, biological growth, pH, and chemical compatibility. Schedule filtration backwashing and routine flushing. |
| Practical design note: a fitting cannot guarantee 90–95% application efficiency by itself. The result also depends on filtration, pressure regulation, tape flow rate, row length, elevation, emitter spacing, flushing, maintenance, and irrigation scheduling. Always confirm the actual tape outside diameter, wall thickness, pressure rating, and fitting dimensions before installation. | |||||||
Select 120-Mesh Filtration to Protect Tape and Prevent Emitter Clogging
How to Choose Drip Tape Fittings in 2026?
Drip tape fittings must match the tape’s diameter, wall thickness, and operating pressure. A loose connection can leak beside the crop row. An overly tight fitting may damage the tape inlet. During field inspections, I check the seal by running water briefly before covering the lines. Small details matter. Choose fittings with smooth internal passages to reduce turbulence and debris buildup.
A 120-mesh filter is a practical protection point for many drip tape systems. It helps remove fine sand, algae fragments, and suspended particles before they reach the emitters. However, mesh numbers can vary by screen design. Confirm the manufacturer’s actual filtration rating and flow capacity. A filter that is too small may create excessive pressure loss. Watch the pressure gauge during irrigation.
Clean the filter regularly, especially after heavy wind or surface-water use. Flush the mainline and submain before connecting fresh tape. Check it weekly. I once focused on fitting quality but neglected a partially blocked screen. The emitters delivered uneven flow within days. That mistake showed me that filtration and fittings must be selected as one system. Leave enough access around the filter for cleaning, and install shutoff valves where maintenance will not disturb nearby beds.
How to Choose Drip Tape Fittings in 2026?
Select 120-Mesh Filtration to Protect Tape and Prevent Emitter Clogging
Screen mesh indicates the number of openings per linear inch. Higher mesh numbers generally provide finer filtration. A 120-mesh screen has an approximate opening size of 125 microns, making it a practical filtration target for many drip-tape systems. Always confirm the required filtration level with the tape manufacturer's specifications and the quality of the irrigation water.
Check Pressure Ratings Against Typical Drip-Tape Operating Pressures
When choosing drip tape fittings in 2026, pressure rating deserves close attention. FAO Irrigation and Drainage Paper 36 reports that drip irrigation commonly operates near 1 bar, or 14.5 psi. Many thin-wall drip tapes work around 8–15 psi, depending on thickness, emitter spacing, and flow rate. Check the tape manufacturer’s operating range before selecting connectors. Do not rely on appearance alone.
The fitting’s rated pressure must exceed the highest pressure it may experience. USDA NRCS National Engineering Handbook, Part 652, identifies approximately 10–30 psi as a common microirrigation design range. That range includes pressures above many drip tapes’ normal working levels. A fitting rated for 10 psi may fail near a 15 psi inlet. That is a poor match. Choose components with a practical safety margin, especially near pumps, filters, and field valves. Account for pressure surges during rapid valve closure. Small leaks often appear at barbed joints first. They can enlarge as water temperature rises or tubing softens.
Measure pressure at the tape inlet, not only at the pump gauge. Use a calibrated gauge and test the system while operating. I have seen installations pass a static check, then leak under flow. That mistake is easy to repeat. Soil movement, uneven beds, and repeated seasonal installation also weaken fittings. Review the pressure rating, material condition, connection method, and expected service life together. A stronger fitting is not automatically better if it damages the tape during installation.
Verify Material, UV Resistance, and Connector Compatibility for 2026 Systems
How to Choose Drip Tape Fittings in 2026?
Choosing drip tape fittings starts with material verification, not appearance. Polypropylene suits many irrigation layouts because it resists moisture and common agricultural chemicals. Acetal fittings can provide stronger threads and stable dimensions under pressure. Check the technical sheet for tensile strength, temperature range, and chemical resistance. Do not trust color alone. Two black fittings may perform very differently in sunlight.
UV resistance deserves special attention in 2026 systems. Fittings exposed above soil can become brittle after repeated summer exposure. Ask for UV testing details, additive information, and the expected service environment. Inspect a sample after storage and installation. Look for cracking around threads and stress marks near the tape inlet. I once assumed thicker plastic meant better durability. It did not, because the connector had poor UV protection.
Compatibility is equally important. Match the fitting to the tape’s nominal diameter, wall thickness, outlet size, and pressure rating. A tight-looking barb can still leak when the tape softens in heat. Confirm gasket dimensions and connector geometry before ordering large quantities. Install several samples, pressurize the line, and check them after several hours. Hand assembly may feel secure, yet uneven insertion can damage the tape. I still allow for this mistake in field planning. Supplier drawings, batch records, and written test data make decisions more reliable than visual inspection.
Article Source:
Contact us
Please fill out the enquiry form, and our dedicated team will promptly attend to your request